Anas Garage Doors

Local Businesses Blog in Texas

How Much Does Landscaping Service Typically Cost In Keller? – Green Earth Services

Southlake Landscaping Keller TX encompass a wide range of tasks, from basic lawn maintenance to intricate garden design and installation.

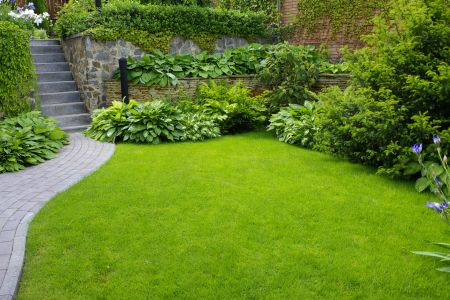
The cost of landscaping services can vary significantly depending on various factors, including the size and complexity of the project, the types of services required, and the expertise of the landscaping company. In this comprehensive guide, we’ll delve into the typical costs associated with landscaping services in Keller, providing insights, estimates, and considerations for homeowners and businesses alike.

1. Understanding the Scope of Landscaping Services

Landscaping services encompass a broad spectrum of tasks aimed at enhancing the beauty and functionality of outdoor spaces. These services may include:

  • Lawn maintenance: Mowing, edging, fertilizing, and weed control.
  • Landscape design: Planning and creating outdoor living spaces, garden layouts, and hardscapes.
  • Planting: Selecting and installing trees, shrubs, flowers, and other vegetation.
  • Irrigation: Designing and installing irrigation systems to ensure proper watering.
  • Hardscaping: Building features such as patios, pathways, retaining walls, and outdoor kitchens.
  • Landscape lighting: Installing lighting fixtures to enhance safety and ambiance.
  • Maintenance: Regular upkeep, including pruning, mulching, and seasonal clean-up.

2. Factors Affecting Landscaping Costs

Several factors can influence the cost of landscaping services in Keller:

  • Size of the property: Larger properties typically require more materials and labor, resulting in higher costs.
  • Complexity of the project: Projects involving intricate designs or specialized features may require additional time and expertise, leading to increased costs.
  • Materials used: The quality and type of materials used, such as plants, paving stones, or lighting fixtures, can impact the overall cost.
  • Accessibility: Factors such as site accessibility and terrain can affect the ease of installation and, consequently, the cost.
  • Seasonality: Demand for landscaping services may fluctuate throughout the year, impacting pricing accordingly.
  • Contractor expertise: Experienced and reputable landscaping companies may charge higher rates for their services, reflecting their expertise and quality of work.

3. Cost Estimates for Landscaping Services in Keller

While exact pricing for landscaping services can vary based on the factors mentioned above, here are some rough estimates for common landscaping tasks in Keller:

  • Basic lawn maintenance (mowing, edging, fertilizing): $50 to $100 per visit for an average-sized yard.
  • Landscape design consultation: $100 to $300 per hour, depending on the complexity of the project.
  • Planting: $500 to $2,000 for a small to medium-sized garden, including plants and labor.
  • Irrigation system installation: $1,500 to $5,000 or more, depending on the size and complexity of the system.
  • Hardscaping (patios, pathways, retaining walls): $1,500 to $10,000 or more, depending on materials and size.
  • Landscape lighting installation: $500 to $3,000 or more, depending on the number of fixtures and complexity.
  • Ongoing maintenance: $100 to $500 per month, depending on the frequency and scope of services.

4. Considerations for Hiring a Landscaping Company

When hiring a landscaping company in Keller, it’s essential to consider more than just cost. Here are some additional factors to keep in mind:

  • Reputation and reviews: Look for companies with positive reviews and a proven track record of customer satisfaction.
  • Licensing and insurance: Ensure that the company is properly licensed and insured to protect yourself and your property.
  • Portfolio and references: Review the company’s portfolio of past projects and ask for references from satisfied clients.
  • Communication and collaboration: Choose a company that listens to your needs and communicates effectively throughout the project.
  • Sustainability practices: Consider companies that prioritize sustainable landscaping practices and eco-friendly materials.

In conclusion, the cost of landscaping services in Keller can vary depending on a variety of factors. By understanding the scope of services, considering key factors, and obtaining multiple quotes from reputable companies, homeowners and businesses can make informed decisions that align with their budget and landscaping goals.

Green Earth Services

1110-1130 Mossy Rock Dr, Keller, TX 76248, United States

1-817-966-5292

How Program Craftsman Garage Door Opener – First Responder Garage Doors

Garage Door Repair Southlake TX are known for their reliability and durability, but programming them can sometimes be confusing.

Whether you’re setting up a new opener or reprogramming an existing one, this step-by-step guide will walk you through the process to ensure smooth operation of your garage door.

: Prepare Your Craftsman Garage Door Opener

Before you begin programming your Craftsman garage door opener, make sure you have the following materials and information on hand:

  • Craftsman garage door opener remote control
  • Ladder (if needed)
  • Power source for the opener (e.g., battery or electricity)
  • Model number and manufacturer information for your garage door opener

: Locate the “Learn” Button

Most Craftsman garage door openers have a “Learn” button located on the motor unit. This button is typically located near the antenna wire or on the back of the motor unit. Consult your opener’s user manual if you’re unsure where to find it.

: Clear Existing Codes (if necessary)

If you’re reprogramming your garage door opener or adding a new remote, it’s essential to clear any existing codes from the opener’s memory. To do this, press and hold the “Learn” button for about 10 seconds until the indicator light on the motor unit blinks, indicating that the codes have been cleared.

: Program the Remote Control

Once you’ve cleared any existing codes, you can now program the remote control to your Craftsman garage door opener. Follow these steps:

  1. Press and release the “Learn” button on the motor unit. The indicator light will illuminate, indicating that the opener is in programming mode.
  2. Within 30 seconds, press and hold the button on the remote control that you wish to program. Hold the button until the indicator light on the motor unit blinks, indicating that the remote control has been successfully programmed.
  3. Release the button on the remote control. The indicator light on the motor unit should stop blinking, indicating that programming is complete.

: Test the Remote Control

After programming the remote control, it’s essential to test it to ensure that it operates the garage door opener correctly. Stand within range of the opener and press the button on the remote control. The garage door should open or close smoothly in response to the remote signal.

: Repeat for Additional Remotes (if necessary)

If you have multiple remote controls that you’d like to program to the garage door opener, repeat the programming process outlined in Step 4 for each additional remote. Be sure to press the “Learn” button on the motor unit before programming each remote to clear any existing codes.

: Program the Keypad (optional)

If your Craftsman garage door opener includes a keypad for keyless entry, you can program it using a similar process. Consult your opener’s user manual for specific instructions on programming the keypad, as the process may vary depending on the model.

: Finalize and Secure

Once you’ve programmed all desired remotes and accessories, finalize the programming by pressing the “Learn” button on the motor unit one final time to exit programming mode. Ensure that the garage door opener is securely mounted and that all accessories are properly installed and functioning.

Conclusion:

Programming a Craftsman garage door opener is a straightforward process that can be completed in just a few simple steps. By following this step-by-step guide, you can quickly and easily program your opener to operate smoothly and efficiently, providing you with convenient access to your garage.

First Responder Garage Doors

180 State St Suite 225, Southlake, TX 76092, United States

1-817-991-5551

How Program Chamberlain Garage Door Opener – Central Valley Gates & Access Control

Garage Door Repair Suite C Sacramento CA are known for their reliability and convenience, but programming them can sometimes be confusing.

Whether you’re setting up a new opener or reprogramming an existing one, this step-by-step guide will walk you through the process to ensure smooth operation of your garage door.

: Gather Required Materials

Before you begin programming your Chamberlain garage door opener, gather the following materials:

  • Chamberlain garage door opener remote control
  • Ladder (if needed)
  • Power source for the opener (e.g., battery or electricity)

: Locate the “Learn” Button

Most Chamberlain garage door openers have a “Learn” button located on the motor unit. This button is typically located near the antenna wire or on the back of the motor unit. Consult your opener’s user manual if you’re unsure where to find it.

: Clear Existing Codes (if necessary)

If you’re reprogramming your garage door opener or adding a new remote, it’s essential to clear any existing codes from the opener’s memory. To do this, press and hold the “Learn” button for about 10 seconds until the indicator light on the motor unit blinks, indicating that the codes have been cleared.

: Program the Remote Control

Once you’ve cleared any existing codes, you can now program the remote control to your Chamberlain garage door opener. Follow these steps:

  1. Press and release the “Learn” button on the motor unit. The indicator light will illuminate, indicating that the opener is in programming mode.
  2. Within 30 seconds, press and hold the button on the remote control that you wish to program. Hold the button until the indicator light on the motor unit blinks, indicating that the remote control has been successfully programmed.
  3. Release the button on the remote control. The indicator light on the motor unit should stop blinking, indicating that programming is complete.

: Test the Remote Control

After programming the remote control, it’s essential to test it to ensure that it operates the garage door opener correctly. Stand within range of the opener and press the button on the remote control. The garage door should open or close smoothly in response to the remote signal.

: Repeat for Additional Remotes (if necessary)

If you have multiple remote controls that you’d like to program to the garage door opener, repeat the programming process outlined in Step 4 for each additional remote. Be sure to press the “Learn” button on the motor unit before programming each remote to clear any existing codes.

: Program the Keypad (optional)

If your Chamberlain garage door opener includes a keypad for keyless entry, you can program it using a similar process. Consult your opener’s user manual for specific instructions on programming the keypad, as the process may vary depending on the model.

: Finalize and Secure

Once you’ve programmed all desired remotes and accessories, finalize the programming by pressing the “Learn” button on the motor unit one final time to exit programming mode. Ensure that the garage door opener is securely mounted and that all accessories are properly installed and functioning.

Conclusion:

Programming a Chamberlain garage door opener is a straightforward process that can be completed in just a few simple steps. By following this step-by-step guide, you can quickly and easily program your opener to operate smoothly and efficiently, providing you with convenient access to your garage.

Central Valley Gates & Access Control

4817 Myrtle Ave. Suite C Sacramento, CA. 95841

916-745-4011

How Much To Replace A Garage Door Torsion Spring – Ryder Garage Doors

Garage Door Repair Vancouver WA plays a crucial role in the operation of your garage door, helping to counterbalance the weight of the door and facilitate smooth opening and closing.

When a torsion spring breaks or becomes worn out, it can lead to significant issues with the functionality and safety of your garage door system. In this guide, we’ll explore everything you need to know about the cost of replacing a garage door torsion spring, including factors that affect the cost, types of springs available, and tips for selecting the right replacement.

Factors Affecting the Cost

Several factors can influence the cost of replacing a garage door torsion spring, including:

  1. Type of Spring: Garage doors typically use two types of torsion springs: standard torsion springs and high-cycle torsion springs. Standard torsion springs are designed for typical residential use and have a lifespan of around 10,000 cycles, while high-cycle torsion springs are more durable and can last up to 100,000 cycles. High-cycle torsion springs are generally more expensive but offer greater longevity and reliability.
  2. Size and Weight of the Door: The size and weight of your garage door will determine the size and strength of the torsion springs required. Larger and heavier doors require stronger springs, which may be more expensive to replace.
  3. Number of Springs: Some garage doors use a single torsion spring, while others use multiple springs for added support and balance. The number of springs required for your door will impact the overall cost of replacement.
  4. Quality of Springs: The quality of the torsion springs used for replacement will affect the cost. Higher-quality springs made from durable materials may have a higher upfront cost but can offer better performance and longevity, potentially saving you money in the long run.
  5. Labor Costs: In addition to the cost of the springs themselves, you’ll also need to factor in labor costs for professional replacement. Hiring a professional garage door technician ensures that the replacement is done correctly and safely, reducing the risk of accidents or injuries.

Cost Range of Replacing Garage Door Torsion Spring

The cost of replacing a garage door torsion spring can vary depending on the factors mentioned above. Here’s a breakdown of the cost range based on different scenarios:

  1. Standard Torsion Spring Replacement:
    • Single Spring Replacement: $150 to $300
    • Dual Spring Replacement: $250 to $500
  2. High-Cycle Torsion Spring Replacement:
    • Single Spring Replacement: $250 to $500
    • Dual Spring Replacement: $400 to $800
  3. Additional Costs and Considerations:
    • Labor Costs: Professional replacement typically costs between $100 and $200 per spring, depending on the complexity of the job and the technician’s experience.
    • Emergency Service: If your garage door torsion spring breaks unexpectedly, you may need to pay extra for emergency service or after-hours replacement.
    • Additional Parts: Depending on the condition of your garage door system, you may need to replace other parts such as cables, pulleys, or rollers during the replacement process. These additional parts can add to the overall cost but are essential for ensuring the proper functioning of the door.

DIY vs. Professional Replacement

While some homeowners may attempt to replace a garage door torsion spring themselves to save money, this is not recommended unless you have experience and expertise in garage door repair. Torsion springs are under high tension and can be dangerous to work with, posing a risk of serious injury or property damage if mishandled. Hiring a professional garage door technician ensures that the replacement is done safely and correctly, reducing the risk of accidents and ensuring the longevity of your garage door system.

Conclusion:

In conclusion, the cost of replacing a garage door torsion spring depends on factors such as the type of spring, size and weight of the door, number of springs, quality of springs, and labor costs. By understanding these factors and working with a reputable garage door technician, you can ensure that your garage door torsion spring is replaced correctly and safely, restoring the functionality and reliability of your garage door system.

Ryder Garage Doors

PO Box 5474 Vancouver, WA 98668

1-360-843-7981

How Much Does A Garage Door Spring Cost To Replace – A 24 Hour Door Service

Garage Door Repair Madison MS are essential components of the garage door system, responsible for counterbalancing the weight of the door and facilitating smooth opening and closing movements.

Over time, garage door springs may wear out or break due to factors such as frequent use, temperature fluctuations, and metal fatigue, necessitating replacement to ensure safe and efficient operation of the garage door.

Types of Garage Door Springs

There are two main types of garage door springs:

  1. Torsion Springs: Torsion springs are mounted horizontally above the garage door opening and are attached to a metal shaft. When the door is closed, torsion springs are under tension, storing energy that is released to lift the door when it is opened.
  2. Extension Springs: Extension springs are mounted vertically on either side of the garage door tracks and stretch and contract to facilitate door movement. Extension springs are typically found on older garage door systems and are less common in newer installations.

Factors Affecting the Cost of Garage Door Spring Replacement

Several factors influence the cost of replacing garage door springs, including:

  1. Type of Spring: Torsion springs are generally more expensive to replace than extension springs due to their complexity and higher load-bearing capacity.
  2. Size and Weight of the Door: Larger and heavier garage doors require stronger springs to support their weight, which can affect the cost of replacement.
  3. Number of Springs: Some garage door systems use multiple springs to counterbalance the door’s weight. The cost of replacement will depend on the number of springs that need to be replaced.
  4. Quality and Material: The quality and material of the springs can also affect their cost. High-quality, durable springs made of corrosion-resistant materials may be more expensive upfront but can offer better performance and longevity.

Cost Range of Garage Door Spring Replacement

The cost of replacing garage door springs varies depending on the aforementioned factors and can range from $150 to $400 or more. Here’s a breakdown of the cost range based on different considerations:

  1. Torsion Springs:
    • Single Torsion Spring: $150 to $250
    • Double Torsion Springs: $250 to $400
  2. Extension Springs:
    • Pair of Extension Springs: $150 to $250
    • Single Extension Spring: $75 to $150

Additional Costs and Considerations

In addition to the cost of the springs themselves, there may be additional costs and considerations to factor in:

  • Professional Installation: Garage door spring replacement can be dangerous and should be handled by trained professionals. Professional installation ensures proper installation and minimizes the risk of accidents or injuries.
  • Labor Costs: Labor costs for garage door spring replacement vary depending on factors such as labor rates, the complexity of the job, and any additional services required.
  • Additional Parts and Components: In some cases, additional parts and components such as cables, pulleys, and brackets may need to be replaced along with the springs. These additional parts can add to the overall cost of the replacement.
  • Warranty: Consider the warranty offered by the manufacturer or installer for the springs and labor. A warranty can provide peace of mind and protection against defects or malfunctions.

Conclusion:

In conclusion, the cost of replacing garage door springs varies depending on factors such as the type of spring, size and weight of the door, number of springs, quality and material, and additional costs and considerations. By carefully considering these factors and seeking professional assistance, you can ensure safe and efficient replacement of your garage door springs.

A 24 Hour Door Service

417 Post Oak Cove, Madison, MS 39110, United States

1-601-664-8935

Elevate Your Kitchen: A Guide to Kitchen Doors and Upgrades

doors, ironmongery and furniture in the UK Door supplies online

Door Supplies Online

The kitchen is often considered the heart of the home, and its design plays a significant role in both functionality and aesthetics. One of the key elements of a kitchen’s design is its doors, which not only serve as entry points but also contribute to the overall style and ambiance. In this guide, we’ll explore the importance of kitchen doors and provide insights into popular upgrades that can transform your culinary space.

The Role of Kitchen Doors
Kitchen doors serve multiple purposes beyond mere functionality. They act as a focal point, adding character and style to the room. Choosing the right doors can enhance the overall design theme, whether it’s modern, traditional, or eclectic. Additionally, kitchen doors play a crucial role in organizing and concealing storage spaces, keeping the kitchen clutter-free and visually appealing.

Popular Kitchen Door Upgrades
Cabinet Door Styles: Consider upgrading your cabinet doors to reflect current design trends. Shaker-style doors with clean lines and recessed panels are timeless and versatile, while sleek flat-panel doors offer a modern look. Glass-front doors can add a touch of elegance and showcase your favorite dishware or collectibles.

Material Choices: Explore different materials for your kitchen doors to achieve the desired aesthetic and durability. Solid wood doors, such as oak or maple, lend warmth and richness to the space. For a budget-friendly option, consider laminate or thermofoil doors that mimic the look of wood without the higher cost.

Hardware and Accessories: Upgrading door hardware can make a significant impact on the overall appearance of your kitchen. Opt for stylish handles, knobs, or pulls that complement the door style and finish. Additionally, incorporate accessories like soft-close hinges, pull-out trays, and spice racks for enhanced functionality.

Color and Finish: Changing the color or finish of your kitchen doors can dramatically transform the room. Choose neutral tones for a timeless appeal or bold colors for a statement look. Matte finishes offer a contemporary vibe, while glossy finishes reflect light and create a sense of openness.

Customization: Consider customizing your kitchen doors to fit specific design preferences and functional needs. Custom doors allow you to choose unique styles, sizes, and features tailored to your space. This level of customization ensures a personalized and cohesive look throughout the kitchen.

Conclusion
Upgrading your kitchen doors is a powerful way to breathe new life into the heart of your home. Whether you’re aiming for a complete renovation or a simple refresh, thoughtful choices in door styles, materials, hardware, and finishes can make a world of difference. Explore the possibilities and unleash the full potential of your kitchen with stylish and functional door upgrades.

Enhancing Functionality and Style: A Guide to Kitchen Drawer Fronts

bespoke handmade kitchens in UK

Bryan Turner Kitchens

The kitchen is the heart of the home, and its design plays a crucial role in both functionality and aesthetics. One often-overlooked aspect of kitchen design is the drawer fronts, which not only contribute to the overall look of cabinetry but also play a significant role in enhancing storage efficiency and organization. In this blog post, we’ll explore the importance of kitchen drawer fronts, different types available, and tips for choosing the right ones to elevate your kitchen experience.

Importance of Kitchen Drawer Fronts
Kitchen drawer fronts serve several essential purposes in a kitchen:

Aesthetic Appeal: Drawer fronts contribute significantly to the overall aesthetic of your kitchen. They can complement the style of your cabinetry, whether it’s traditional, modern, or transitional, and add visual interest to the space.

Storage Organization: Drawer fronts help keep your kitchen organized by concealing the contents of drawers. They create a cohesive look and prevent clutter from being visible, contributing to a clean and tidy kitchen environment.

Functional Access: The design of drawer fronts can affect how easily you can access items stored inside. Well-designed drawer fronts with ergonomic handles or integrated pull-outs enhance functionality and make everyday tasks more efficient.

Types of Kitchen Drawer Fronts
Flat Panel: Flat panel drawer fronts have a simple, flat surface without any raised or recessed details. They offer a clean and minimalist look, making them suitable for modern and contemporary kitchens.

Raised Panel: Raised panel drawer fronts feature a center panel that is raised above the surrounding frame. This style adds depth and texture to cabinetry, making it a popular choice for traditional and classic kitchen designs.

Slab: Slab drawer fronts are characterized by a single, solid piece of material with no embellishments or panels. They have a sleek and streamlined appearance, ideal for achieving a modern and minimalist aesthetic.

Shaker: Shaker drawer fronts feature a five-piece construction with a recessed center panel and clean lines. They offer a versatile look that suits various kitchen styles, from farmhouse to transitional.

Tips for Choosing Kitchen Drawer Fronts
Consider the Kitchen Style: Choose drawer fronts that complement the overall style of your kitchen. For example, opt for raised panel fronts for a traditional look or slab fronts for a contemporary vibe.

Material and Finish: Select high-quality materials and finishes that are durable and easy to maintain. Popular choices include wood, laminate, acrylic, and thermofoil, each offering different aesthetics and benefits.

Hardware: Pay attention to hardware options such as handles, knobs, and pulls. Choose hardware that not only complements the drawer fronts but also enhances functionality and ergonomics.

Customization: Explore customization options to tailor drawer fronts to your specific needs. Consider features like soft-close mechanisms, integrated handles, or custom sizing for a personalized touch.

Budget: Determine your budget for drawer fronts and choose options that offer the best value in terms of quality, durability, and aesthetics.

By giving careful thought to kitchen drawer fronts, you can enhance both the functionality and style of your kitchen. Whether you prefer a classic and elegant look or a sleek and modern design, the right drawer fronts can make a significant impact on your kitchen’s overall appeal and efficiency.

Simple and Effective Self-Massage Techniques for Relaxation and Relief

Massage Spa, infrared sauna, pre natal massage in New Jersey

Manava Therapy

In the hustle and bustle of daily life, finding moments of relaxation and relief is essential for our well-being. While a professional massage is a luxurious treat, you can bring the soothing benefits of massage into the comfort of your home with simple and effective self-massage techniques. In this guide, we explore easy-to-follow methods that can help you unwind, alleviate stress, and ease those nagging aches and pains.

  1. Stress-Busting Scalp Massage:

Technique:

Sit or lie down comfortably.

Use your fingertips to gently massage your scalp in circular motions.

Gradually move from the forehead to the back of your head, applying light pressure.

Focus on areas where tension tends to accumulate, like the temples and the base of the skull.

Benefits:

Relieves tension headaches and migraines.

Promotes relaxation by stimulating scalp nerves.

  1. Soothing Neck and Shoulder Release:

Technique:

Sit with a straight back or stand comfortably.

Use your fingertips or palms to massage the sides and back of your neck.

Move your hands down to your shoulders, kneading any tense muscles.

Perform gentle neck stretches by tilting your head from side to side.

Benefits:

Eases neck and shoulder tension from prolonged sitting or stress.

Improves flexibility and range of motion.

  1. Stress-Relieving Facial Massage:

Technique:

Apply a small amount of facial oil or moisturizer.

Use your fingertips to gently massage your forehead, temples, and jawline in circular motions.

Apply slight pressure to acupressure points around the eyes and on the sides of the nose.

Finish by lightly massaging your neck and collarbone.

Benefits:

Relaxes facial muscles, reducing tension and promoting a youthful glow.

Alleviates eye strain and sinus congestion.

  1. Calming Chest and Heart Space Massage:

Technique:

Sit comfortably with your back straight.

Use your fingertips to gently massage your chest in upward motions.

Focus on the area around your heart, using light pressure.

Incorporate deep breaths as you massage to enhance relaxation.

Benefits:

Relieves tightness in the chest and upper back.

Promotes a sense of emotional release and openness.

  1. Tranquil Hand and Wrist Massage:

Technique:

Sit with your hands comfortably resting on a surface.

Use your thumb to massage the palm of each hand in circular motions.

Gently stretch and massage each finger, paying attention to the joints.

Massage the wrists with light pressure using circular motions.

Benefits:

Alleviates tension from repetitive movements or computer use.

Improves flexibility and reduces stiffness.

  1. Relaxing Lower Back and Hip Release:

Technique:

Lie on your back with your knees bent.

Place a tennis ball under your lower back and gently roll over it.

Focus on areas of tension, applying gentle pressure.

Perform knee-to-chest stretches to release tension in the lower back and hips.

Benefits:

Relieves lower back pain and discomfort.

Enhances flexibility and reduces muscle tightness.

  1. Rejuvenating Foot Massage:

Technique:

Sit comfortably or use a tennis ball under your foot while seated.

Roll the ball under your foot, applying gentle pressure.

Use your thumbs to massage the arches and heels in circular motions.

Stretch and rotate your ankles to enhance the massage.

Benefits:

Eases foot fatigue and plantar fasciitis.

Promotes overall relaxation and grounding.

Conclusion: Nurturing Your Well-Being Through Self-Care

Integrating these simple and effective self-massage techniques into your routine can be a transformative act of self-care. Whether you are seeking relaxation, stress relief, or relief from minor aches and pains, these practices offer a rejuvenating escape within the confines of your home. Remember to listen to your body, breathe deeply, and allow the calming touch of your own hands to nurture your well-being. By embracing these self-massage rituals, you not only unlock physical benefits but also cultivate a deeper connection with your body, fostering a sense of balance and tranquility in your daily life.

At MaNaVa Advanced Massage Therapy, your comfort is our top priority. Schedule an appointment, or drop by today to begin your path to wellness!

Indulge in Decadence: A Symphony of Chocolate Delights

the clouds boutique, Best Chocolates in UAE

The Clouds Boutique

Chocolates, the exquisite confection that transcends time and culture, have an unparalleled ability to captivate our senses and evoke pure bliss. Crafted from the cocoa bean, each velvety bite tells a story of passion, precision, and a commitment to the art of flavor.

From the moment the rich aroma wafts through the air, tantalizing our taste buds, to the silky-smooth texture that melts on the tongue, chocolates are a celebration of sensory pleasure. The world of chocolates is as diverse as it is delectable, offering a kaleidoscope of flavors, textures, and pairings to suit every palate.

The Journey of Chocolate:

Cocoa Harvesting: The journey begins in tropical regions where skilled farmers cultivate and harvest cocoa beans, the soul of chocolate. Meticulous care in cultivation ensures the finest quality.

Bean to Bar Craftsmanship: Artisan chocolatiers transform raw cocoa beans into luxurious bars, each step guided by a passion for perfection. The careful roasting and grinding process unlocks the beans’ full flavor potential.

Diverse Flavors: Chocolates are a canvas for creativity, offering an array of flavors ranging from the classic purity of dark chocolate to the velvety sweetness of milk chocolate and the playful infusion of exotic ingredients like sea salt, fruit, or spices.

Texture Symphony: Explore the texture symphony of chocolates – the snap of a perfectly tempered bar, the creamy silkiness of truffles, or the satisfying crunch of chocolate-covered nuts. Each bite is an orchestrated experience.

Chocolates for Every Occasion:

Celebratory Elegance: Share a box of assorted chocolates to elevate celebrations, birthdays, and anniversaries. The vibrant assortment offers a journey of surprises, each piece a testament to the chocolatier’s artistry.

Expressing Love: In matters of the heart, chocolates convey sentiments with unparalleled sweetness. Heart-shaped truffles, adorned with edible gold, speak volumes of affection.

Gourmet Pairings: Chocolate is a versatile companion, pairing seamlessly with wine, coffee, or even cheese. The complex notes of premium chocolate elevate tasting experiences, making it an indulgence for connoisseurs.

Mindful Moments: In a fast-paced world, chocolates invite moments of mindfulness. A square of dark chocolate with a touch of sea salt becomes a luxurious pause, allowing the senses to savor the present.

A World of Sweet Euphoria

Whether embraced as a gesture of love, a moment of self-indulgence, or a sophisticated culinary experience, chocolates are a universal language of delight. From the simplicity of a single truffle to the complexity of artisanal creations, each chocolate creation is a symphony of flavor and a testament to the enduring allure of this timeless treat. Indulge, savor, and let the world of chocolates envelop you in sweet euphoria.

How To Activate A Chamberlain Garage Door Remote – DoorJam Garage

Garage Door Repair Wake Forest NC allows you to conveniently open and close your garage door with ease.

Whether you’re setting up a new remote or reactivating an existing one, this step-by-step guide will walk you through the process to ensure smooth operation of your garage door opener.

1. Check Compatibility

Before activating your Chamberlain garage door remote, ensure that it is compatible with your garage door opener model. Chamberlain remotes are designed to work with a wide range of Chamberlain, LiftMaster, and Craftsman garage door openers, but it’s essential to confirm compatibility to avoid compatibility issues.

2. Install Batteries

If your Chamberlain garage door remote requires batteries, install them according to the instructions provided in the user manual. Ensure that the batteries are inserted correctly, with the positive and negative terminals aligned properly.

3. Locate the “Learn” Button

Most Chamberlain garage door openers feature a “Learn” button that is used to activate remotes. This button is typically located on the motor unit of the opener near the antenna wire. It may be labeled as “Learn,” “Smart,” or “Program.” Consult your opener’s user manual or look for the button near the antenna wire.

4. Press the “Learn” Button

Once you’ve located the “Learn” button, press it firmly and release it. You’ll notice that the indicator light on the motor unit will begin to blink or change color, indicating that the opener is in programming mode and ready to learn the code from your remote.

5. Activate the Remote

Next, follow these steps to activate your Chamberlain garage door remote:

  • Press and hold the button on the remote that you want to activate. Hold the button down until you see the indicator light on the remote flash or hear a beep. This indicates that the remote’s code has been transmitted to the garage door opener.
  • Some Chamberlain remotes may require you to enter a specific code sequence or follow additional instructions. Refer to your remote’s user manual for detailed activation instructions.

6. Test the Remote

After activating the remote, it’s essential to test it to ensure that it’s working correctly. Stand inside your garage and press the button on the remote. If the activation was successful, your garage door should open or close smoothly in response to the remote’s command.

7. Repeat for Additional Remotes (If Necessary)

If you have multiple Chamberlain garage door remotes that you want to activate, simply repeat the process outlined above for each remote. Press the “Learn” button on the opener, then activate each remote individually, and test each one to ensure that they’re all functioning correctly.

8. Secure Your Remote

Once you’ve activated your Chamberlain garage door remote, be sure to keep it in a safe and secure location, such as your car’s glove compartment or a designated spot inside your home. Avoid leaving the remote in plain sight, where it could be easily stolen or accessed by unauthorized individuals.

Conclusion:

Activating your Chamberlain garage door remote is a straightforward process that allows you to enjoy convenient access to your garage. By following the steps outlined in this guide and consulting your opener’s user manual for specific instructions, you can quickly activate your remote and ensure smooth operation of your garage door opener. If you encounter any difficulties during the activation process, don’t hesitate to reach out to Chamberlain’s customer support or consult a professional for assistance.

DoorJam Garage

3418 Quarry Rd, Wake Forest, NC 27587, United States

1-919-906-6623

Page 1 of 72

Powered by WordPress & Theme by Anders Norén